Classic Sourdough Bread
- Aaron Gruen
- May 23, 2021
- 4 min read

For the chewiest, quickest sourdough loaf, this recipe is your best bet. Partially inspired by Chad Robertson’s original sourdough recipe, this recipe has a different ingredient ratio and streamlines a few key steps and includes several videos and photos for reference. Beginners may find it helpful to transfer the dough to a clear container after kneading, as it helps monitor bubbles and growth. Your sourdough starter is ready for use when it floats in water (to test, simply drop a teaspoon of starter in a cup of water). The dough is kneaded initially and folded as it bakes, greatly improving the gluten structure and creating a very open-crumbed loaf. Before baking, the dough is refrigerated to make slashing and transfer much easier. When you slash the dough, make sure to cut deeply at a low angle—this will maximize the oven spring.
Makes 2 large sourdough boules
Ingredients
750g water
200g mature sourdough starter
900g bread flour
100g whole wheat, rye, or spelt flour
20g Diamond Crystal kosher salt
20g water
1 cup assorted dried fruit, nuts, olives, dry cheese, chocolate, or any mix-ins (optional)
The night before you plan to bake, feed your starter with a 1:5:5 ratio of starter:water:flour. Make sure you have at least 200g of starter.
In a large bowl, whisk 750g water and 200g mature sourdough starter. Add the bread
flour and the whole-wheat flour, and using a flat wooden or rubber spatula, mix the dough just until flour is completely incorporated. Cover, and let the dough rest for 30 minutes.
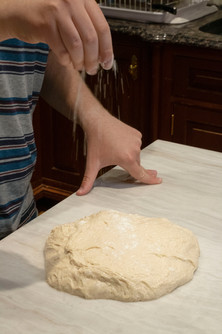
Once the dough has rested, sprinkle 20g kosher salt on top and pour another 20g water over the salt. Using your fingers, pinch the salt and water into the dough.
Incorporating the salt
Once the salt and water are fully incorporated, begin kneading the dough in the bowl by pulling one half of the dough over itself and pushing down on the bread, then rotating and repeating. Knead until the dough passes the windowpane test (see below).

This dough passes the windowpane test
Once the dough passes “the windowpane test,” form it into a ball. At this point, you can transfer the dough to a large, clear container to better monitor its growth—either way, cover with a dish towel and let rest for 30 minutes. At this point, the dough will begin bulk fermentation.
Forming the dough into a ball
After 30 minutes of resting, uncover the bowl and pour any mix-ins atop the dough, if using. Wet your hands, and fold the dough by grabbing one part and folding it over the rest. Repeat this folding 3 times (for a total of 4 folds), then cover, and let rest another 30 minutes.
Folding the bread
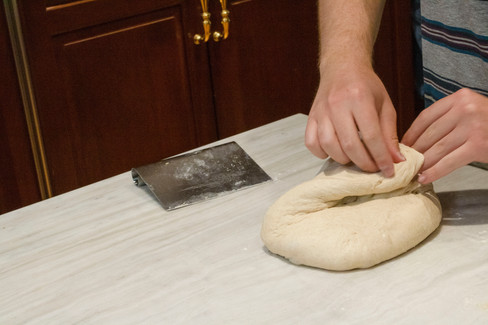
Repeat the resting and folding until the dough has doubled in size, jiggles when shaken, and looks very bubbly, 4-6 hours. Once the dough has completed bulk fermentation, turn it onto an unfloured counter. Dust the top of the dough with all-purpose flour, and using a bench scraper, cut the dough in half. Using the bench scraper and your hands, gently work the dough into a circle, tugging the dough under itself, to form a taught ball. When you can touch the top of the dough with a dry finger and it doesn’t stick, the dough has developed enough surface tension. Repeat with the remaining loaf. Cover the dough balls with cloth dish towels and let rest for 30 minutes on the counter.


The first shaping
While the dough is resting, line two bannetons or colanders with cloth dish towels, and generously dust them with flour. After the dough has rested, remove the cloth towels. Working one at a time, gently scoop the loaf up using your hands and the bench scraper and flip it over on the counter. Fold the bottom half of the dough over itself, followed by the left and right sides, then working from the bottom, roll the dough upwards so the original surface is facing up again. Place the dough ball smooth-side down in a banneton, and repeat with the remaining loaf.


The final shaping
Once the dough is in the banneton, cover with a cloth towel and let rest at room temperature for 1 hour. At this point, you have several options: you may place the dough in the fridge for 1 hour, or let it rest in the fridge for up to 24 hours. Refrigerating the dough for longer will lend a more complex, sour flavor.
45 minutes before you are ready to bake, place a large dutch oven in the oven and heat to 500°F. Once the dough is ready to bake (one at a time), place a sheet of parchment on the counter. Gently flip the dough onto the sheet of parchment, then using a razor or scorer, make a large slash in the top of the dough about ¾” deep at a low angle. Place the hot dutch oven on the stove, remove the top, and gently lower the bread into the dutch oven. Put the top back on and return to the oven. Lower heat to 475° and bake for 20 minutes.
After 20 minutes, remove the lid from the Dutch oven, and continue baking until the bread is well-browned, around 15-20 minutes. Remove from the oven, place bread on a metal rack, and place the dutch oven back in the oven. Return the heat to 500°, and heat another 20 minutes before repeating the scoring and baking process with the second loaf.


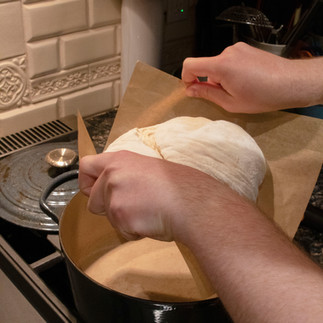
Scoring and placing the bread in the dutch oven
Make sure to completely cool the bread before cutting into it. Serve with butter and flaky salt, or however you prefer it.

The finished loaf
Comments